Jujutsu Beatdown PvE Augments and Index Rewards
PvE augments in Jujutsu Beatdown can add a new attack trigger, help you clear waves, or keep you alive. Choose one that fits your moveset, your health, and the enemies ahead.
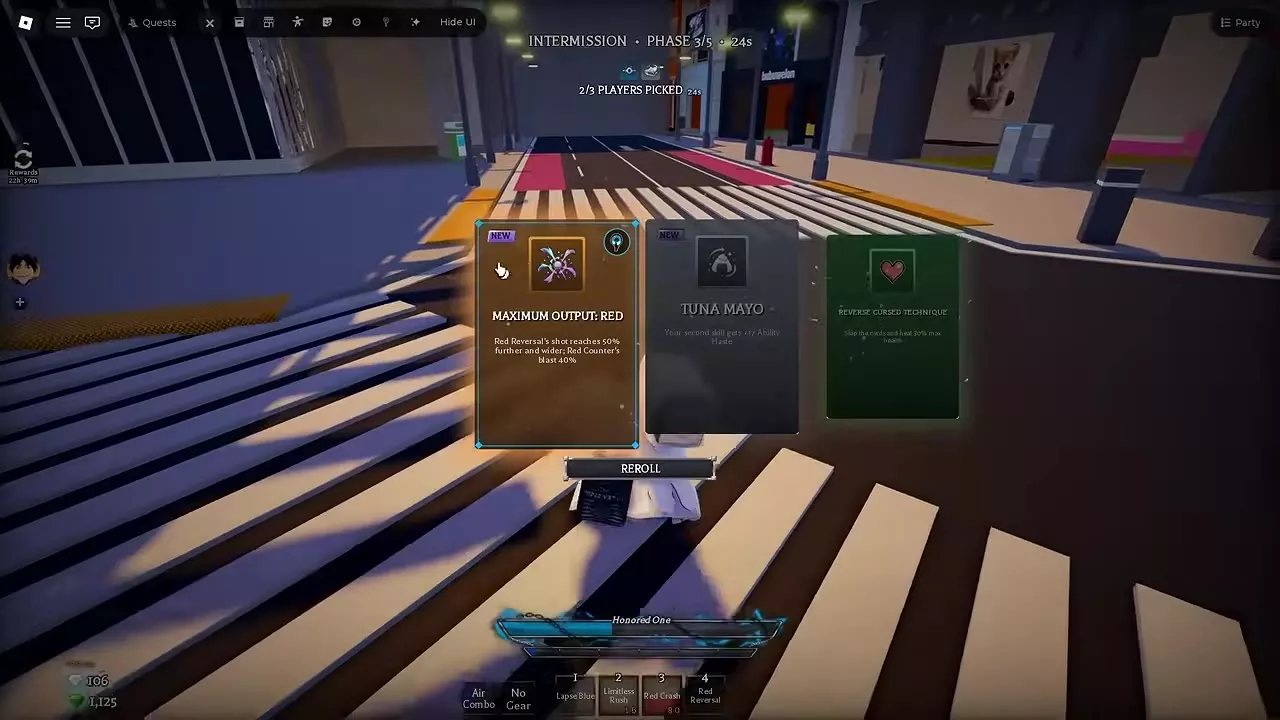
Pick one of three options during each timed intermission, starting before Wave 1. Use REROLL before locking in, or choose Reverse Cursed Technique to trade the pick for immediate healing. Pick a card marked NEW to add it to the Index, then claim its Gems in the PvE lobby.
Intermission Cards and Augment Types
The first intermission opens before Wave 1. Later intermissions give you another choice before the next wave. There are more than 160 PvE augments to collect, and some offers depend on your current moveset.
- Check the phase and countdown at the top of the intermission screen. Hover over a card to read what triggers its effect.
- Select one option before time runs out. In a party, check Players Picked to see how many teammates have chosen. 1/3 means one of the three players has picked.
- When the next wave starts, use your attacks to trigger the augment you chose. Some augments, such as Grand Entrance, activate as the wave begins.
PvE Augment Directory
Use the Effect column to find a card by what it does. Open its name for the trigger, any health threshold, and any move or teammate it requires.
Look up the roles and triggers of PvE intermission augments.
12 objects
|
|
Teammate possession | 10 seconds | — |
|---|---|---|---|
|
Lets you choose a teammate to ride. The host picker opens again when you lose your host.
TipsPick the teammate you want to ride within ten seconds. If you lose that host, use the returning picker to choose again. |
|||
|
|
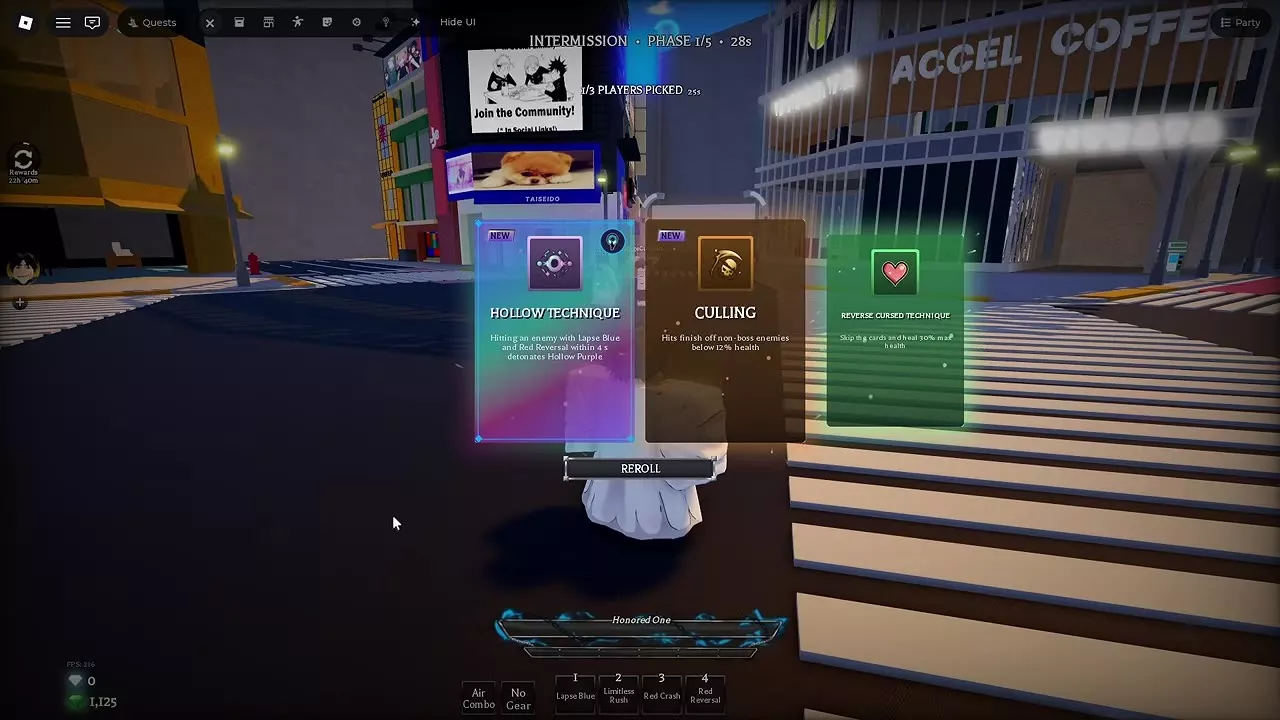
Hollow Purple combo Lapse Blue and Red Reversal both hit within the combo window | — | 4 seconds Between the two required hits |
|
Triggers Hollow Purple when you hit with Lapse Blue and Red Reversal in quick succession.
TipsWith The Honored One, land Lapse Blue and Red Reversal within four seconds to detonate Hollow Purple. |
|||
|
|
M1 combo healing | — | — |
|
Restores health when you land the final hit of your M1 combo.
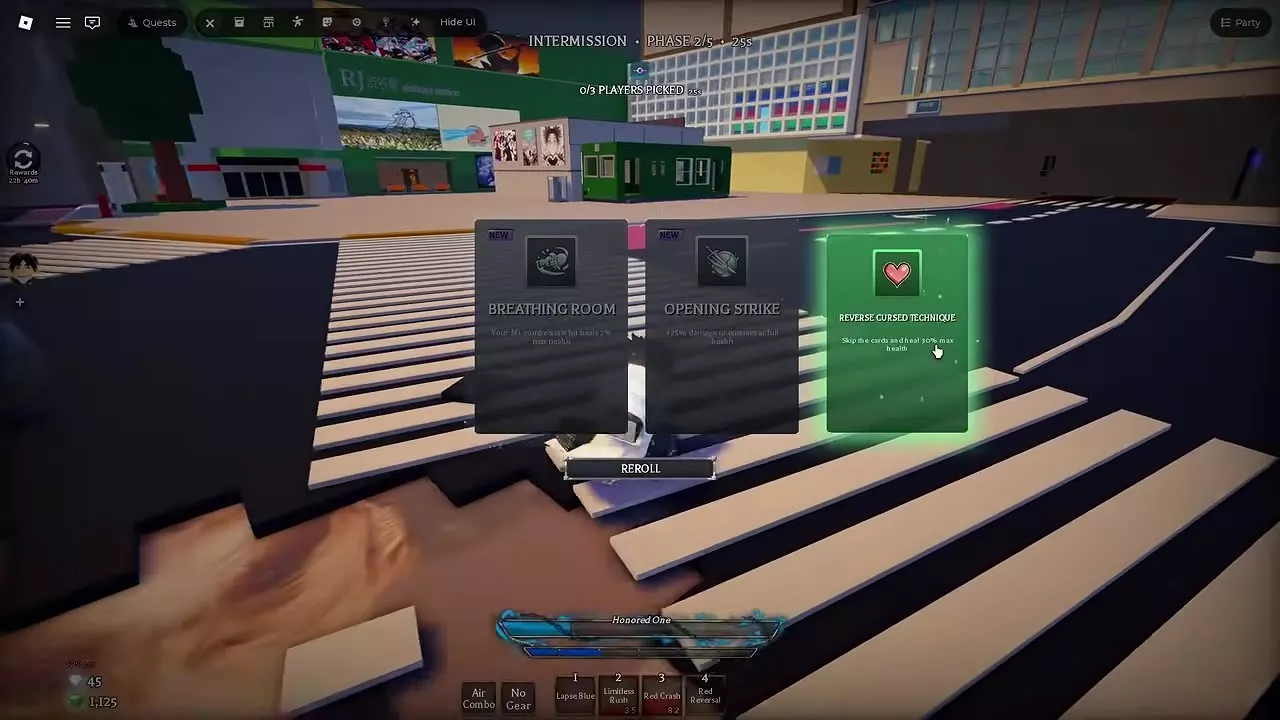
TipsTake Breathing Room when you can land M1 finishers repeatedly. Each landed combo finisher restores 2% of maximum health. |
|||
|
|
Red Reversal upgrade | — | — |
|
Extends Red Reversal's range and widens its hit area.
TipsUse the wider, longer Red Reversal against spread-out enemies or to land the Red hit for Hollow Technique. |
|||
|
|
Combat companion | — | — |
|
A small Kechizu fights alongside you for the run. He punches, bites and spits poison blood.
TipsPick Little Brother for a small Kechizu ally that fights alongside you for the rest of the run with punches, bites, and poison blood. |
|||
|
|
Area damage and stun On landing | — | — |
|
Launches you into the air each wave. Steer the descent to damage and stun enemies around the landing point.
TipsSteer your descent toward clustered enemies to damage and stun them around the landing point. |
|||
|
|
— | — | — |
|
A PvE intermission augment that can be collected in the Index.
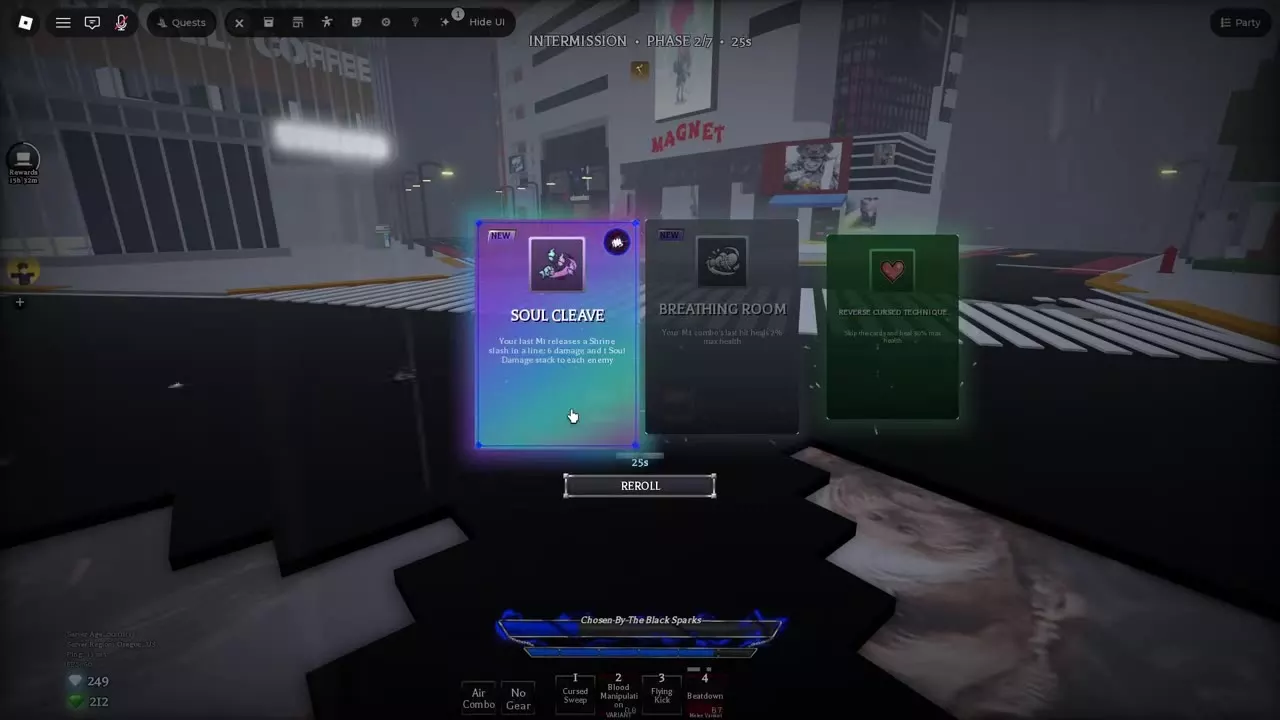
TipsChoose Soul Cleave when it has a NEW label to register it in the Index, then collect the associated Gems in the PvE lobby. |
|||
|
|
Non-boss execute Hit an enemy below the threshold | — | — |
|
Lets attacks execute non-boss enemies below a health threshold.
TipsPick Culling for wave clearing. It executes regular enemies below 12% health. |
|||
|
|
Opening hit damage Enemy at full health | — | — |
|
Increases damage dealt to enemies while they are at full health.
TipsUse Opening Strike for your first hit on regular targets entering at full health. It adds 25% damage against full-health enemies. |
|||
|
|
Low-health damage and speed Below 35% health | — | — |
|
Increases your damage and speed while your health is low.
TipsBelow 35% health, Adrenaline gives 20% damage and 15% speed. Healing above the threshold ends the bonuses. |
|||
|
|
Extra pickup roll Where pickups are enabled | — | — |
|
Adds a second pickup roll on kills and increases Medpack spawns.
TipsPick Lucky Drops in runs with pickups enabled. It adds a 15% pickup roll on kills and increases Medpack spawns by 50%. Choose another card in Challenge and Hardcore, where pickups are disabled. |
|||
|
|
Nail detonation | — | — |
|
The final hit of a combo plants nails in the target and up to two nearby enemies. Your next skill hit detonates all planted nails.
TipsFinish a combo near clustered enemies, then land a skill hit to detonate the nails. |
|||
Reroll, Heal or Build Around Your Moves
If the current offers do little for your run, click REROLL below the cards while the timer is running and before locking in a choice. Read the new offers and pick before the intermission ends.
Match the card to your attacks
- Hollow Technique and Maximum Output: Red. With The Honored One, land Lapse Blue and Red Reversal within four seconds of each other to detonate Hollow Purple. Maximum Output: Red gives Red Reversal 50% more range and 50% more width, so it helps you land the Red hit against spread-out enemies or complete the combo if you already have Hollow Technique. For help choosing a moveset, see the PvE character guide.
- Opening Strike and Culling. Take Opening Strike if you can reliably land the first hit on fresh targets. It adds 25% damage against enemies at full health. Take Culling to finish off regular enemies with a hit when they are below 12% health. Culling's execute applies only to non-boss enemies.
- Hairpin and Grand Entrance. For clustered enemies, use Hairpin if you can finish a melee combo and follow it with a skill hit. The finisher plants nails in the target and up to two nearby enemies. Your next skill hit detonates all planted nails for 6 damage plus 4% of maximum health per nail. With Grand Entrance, steer your descent into a group at the start of each wave to damage and stun enemies around the landing point.
- Little Brother and Lucky Drops. Take Little Brother for help throughout the run. A small Kechizu fights beside you with punches, bites, and poison blood. With pickups enabled, Lucky Drops adds a second pickup roll on kills at 1.5× the drop chance and makes Medpacks spawn 50% more often. Skip it in Challenge and HARDCORE, where pickups are disabled. See PvE mission grades and mode rules.
Weigh immediate healing against a lasting bonus
- Reverse Cursed Technique is the green heart card. Take it if you need health before the next wave. It uses your intermission choice for an immediate heal. Read the amount on the card before picking. In Alien Sorcerer Invasion, the Phase 1 card offered 30% of maximum health in both a Grade 4 team run and a Grade 2 solo run. The Phase 2 card in that Grade 4 team run also offered 30%.
- Breathing Room is better for repeat healing if you regularly land the final hit of a basic attack (M1) combo. Each landed finisher restores 2% of your maximum health.
- Adrenaline gives 20% more damage and 15% more speed while you are below 35% health. Take it if you can safely keep fighting at low health. Healing back to 35% or higher ends the bonuses.
Possession and New Index Entries
Choose a Possession host
With Possession in a team run, select the teammate you want to ride within the 10-second picker. If you lose your host, the picker reopens so you can choose again.
Add augments to the Index and claim Gems
- Choose an augment marked NEW during intermission. For example, pick Soul Cleave when it has that label to register it for the first time. If you're collecting, use NEW to break ties between cards that suit your run.
- Look for Added to Index after selecting the card. The notification names the augment and tells you that Gems are available in the lobby.
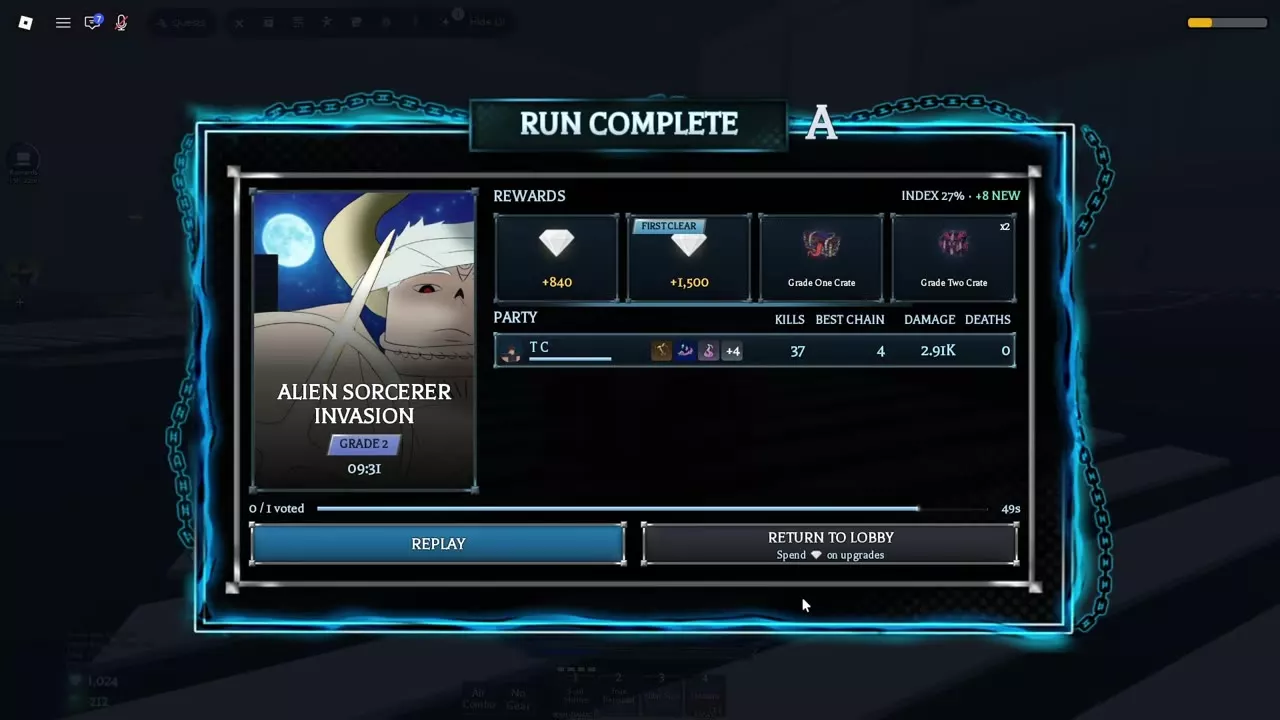
- On Run Complete, read Index for your total completion percentage and +NEW for the number of entries added during that run. For example, an A-rated Grade 2 solo clear of Alien Sorcerer Invasion finished with 27% Index completion and +8 NEW. See the Alien Sorcerer Invasion walkthrough for the mission route.
- Select Return to Lobby and claim the Index Gems in the PvE lobby. Run payouts and eligible First Clear Gems are separate rewards. See the Gems and Kill Bank guide for other ways to earn Gems.